Categories
Parts TRX450R

Installing a Motion Pro Twist Throttle Conversion

I recently installed a Motion Pro Twist Throttle Kit on my 2005 Honda 400EX.  It works so well, I am now installing the similar conversion on my 2004 450R.

This time I will be not be removing the handle bars or plastics.  I am also installing a Pro Armor kill switch at the same time.  Both projects require the fuel tank to be removed.  I will document the kill switch details in another post.

1 Remove the old grips

Whoever installed the grips on these bars used just a touch of glue, so they were easy to remove and very easy to clean up.  I used a pair of wire cutters to clip the ends of the grips open, then tore them back like a candy wrapper.
The Pro Taper handle bars have a diamond pattern cut in the ends to hold the grips better, so they don’t need as much glue.

2 Remove the fuel tank

There are 2 bolts and 2 straps that hold on the fuel tank.  There are also 2 bolts holding the front plastic to the fuel tank.450R Plastic Buckle
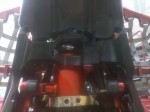
  • Remove the seat
  • Reach over the air filter, towards the carburetor and release the straps from the frame.


  • Remove the 2 bolts on each side holding the plastic to the tank.450R Fuel Valve and Line
  • Pull the plastic away from the tank far enough to fit a wrench in between and remove the bolts that hold the gas tank to the frame.
  • Turn the fuel valve to the Off position.
  • Remove the fuel line from the carburetor.
  • Lift the gas tank up off the bike.

3 Remove the thumb throttle

  • Remove the 2 screws from the bottom of the thumb throttle assembly on the handle 450R Throttle Cable at Carbbars.  Let the cable and assembly hang over the hood.
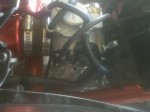
  • Remove the plastic cover from the side of the carb.  There is one Phillips screw near the top of the cover, then lift and pull it out.
  • Detach the end of the cable from the lever.  You can pull down on the cable to create slack, then slide the ball out of the lever.
  • Loosen the lock nut at the top of the carb where it threads in and unscrew the cable end from the carburetor.
  • Guide the throttle cable out through the front of the quad.

4 Install the Motion Pro Twist Throttle Kit

  • Guide the throttle cable back through the quad, reversing the way the original one Motion Pro Twist Throttlecame out.
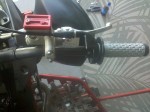
  • Thread the cable in to the top of the carb and attach the end to the throttle lever.
  • Back the threads out until there are a couple rows showing inside the carburetor and tighten the lock nut.
  • Assemble the twist grip and the cable half of the twist throttle and slide them on to the handle bar.
  • Insert the cable in to the housing and attach it to the twist grip. then screw the two halves of the housing together to tighten it to the bars.
  • Twist the throttle all the way open and make sure it returns to closed without any binding.
Categories
TRX450R

Honda TRX450R Alignment Settings

I found this post over on TRX450.org  I am re-posting it here because it’s valuable information that I don’t want to lose.

There is a specific order that you have to follow to do it right,

  1. Caster 6 degrees (make sure the frame is level or it won’t come out right)
  2. Camber 1-1.5 degrees
  3. Toe in 1/8″
  4. Ride height will vary depending on your tires, but you want the front to be 1/4″-1/2″ higher than the back with the rider in full gear sitting neutral on the quad.

This setup will work good on any TRX450 w/arms

One more note:  The tie rod end mounts over the top of the steering stem and the bottom of the spindle.

Categories
400EX Parts TRX450R

How To Install Honda TRX450R Front Shocks On A TRX400EX

I ordered a set of used 450R shocks from a seller on Ebay.  They came off a 2008 TRX450R.  They didn’t look too abused, so I went ahead and installed them on my 400EX without rebuilding them.

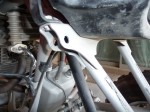
I read about swapping 450R shocks on a 400EX in several articles on the Internet.  They all said you have to grind the shocks, but none really described how to do it.  After holding the shocks in place, I could see that it would be much better to grind a little off the upper shock mount than the actual shock body itself.

After grinding the mount, the top of the shock body still hit where the nut is welded in for the body mount. (Inside the shock  mount tab)  If you really don’t want to grind on your shocks, you could cut off the bolt and tack weld the body mount right to the top of the shock tab, but I chose to grind the shock.  It was just a tiny shave off the surface to make it fit.  If you put the top of the shock in the mounting tab and wiggle it around, trying to line up the bolt hole, you will scratch the surface of the shock enough to figure out where to grind.

With the stock front compression settings at he first notch, the front of the frame measured 12 1/2 inches from the ground.  After swapping in the 450R shocks, the same spot measures 13 inches.  The a-arms are at the bottom of their travel with no rider.  the compression on the 450R schocks is all the way at the top (no extra compression)

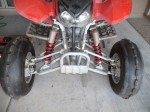
TRX400EX Stock Front ShocksHere is a picture of the stock 400EX front shocks before the work.  The frame height here is 12 1/2 inches


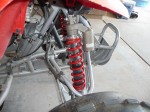
TRX400EX Stock Front Right ShockHere’s a shot of the 400ex stock front shock on the right side.


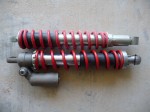
2005 TRX400EX vs 2008 TRX450R ShockThe 400ex shock is at the top of this picture.  You can see the 450r shock is a little bit longer.  When you take off the stock shocks, the a-arms drop a little.  When you put the 450r’s in, they use up all the space.


Honda 400EX Upper Shock MountThis is the upper shock mount before any grinding.  The shock hits the rear part of the mount at the lower curve.


Honda 400EX Upper Shock Mount After GrindingHere is the upper mount after grinding away enough material so the shock fit without hitting the inner part.  The bolt hole still wouldn’t line up.  The top of the shock needs to be ground just a tiny bit.


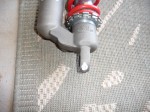
Honda TRX450R Front Shock Top After GrindingIn this picture you can see the small spot that needed to be ground off.  You could also try grinding the nut inside of the shock mount, but since it was such a small amount, I chose to do it this way.


TRX400EX With TRX450R ShocksYou can see the 450R shock mounted in the 400x tabs in this picture.


Honda 400EX With 450R Shocks

This is the final product.  With the 450R  shocks mounted, the front end sits half an inch higher than stock.  The suspension feels much firmer on compression and the rebound is smooth.  Gone is the bounce of the stock 400 shocks.  After riding around the yard, the front end feels way more stable, and it doesn’t lean as much turning.  The real test will be in the sandy whoops at the river bed later this week.


Categories
400EX TRX450R

TRX 400EX vs 450R side by side comparison

I parked the two bikes next to each other to get a comparison.  A stock 450R has almost the same footprint, but you can see here, the extra length and width these aftermarket parts add to the 450.


It will be interesting to see how the 450R handles, I still haven’t had time to take it out.

The only thing I plan on doing before the next race (besides general maintenance) is converting the thumb throttle to a twist and adding a kill switch.

The 450R had these parts when I bought it:

  • Lonestar DC4 +2.5, +1 A-arms
  • Lonestar Swing Arm, +1.5
  • Axcaliber Axle
  • Lonestar Anti Fade Lock Nut
  • Lonestar Billet Rear Caliper Mount Kit
  • Lonestar E-Brake Block Off Plate
  • Elke Stage 4 Front Shocks
  • AC Pro Nerf Bars
  • PRM Bumpers
  • Anti Vibration Steering Stem
  • Pro Taper Handle Bars
  • ESR Intake
  • DASA Racing Full Exhaust
  • 2002 CRF 450 Cam
  • Stainless Braided Brake Lines
  • K&N Cone Filter
  • Aftermarket Hood

Some of the changes I plan on making in the future:

Categories
TRX450R

450R Purchased

I just bought a 2005 Honda TRX450R.  It’s got a lot of suspension upgrades already but the motor is stock, just what I’ve been looking for.  This thing as so much more power than the 400EX.  I’ll put up some pictures and details tomorrow when it’s light out.

This is going to be the new race bike.